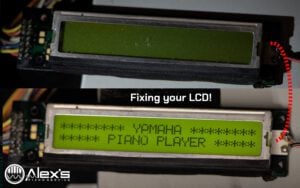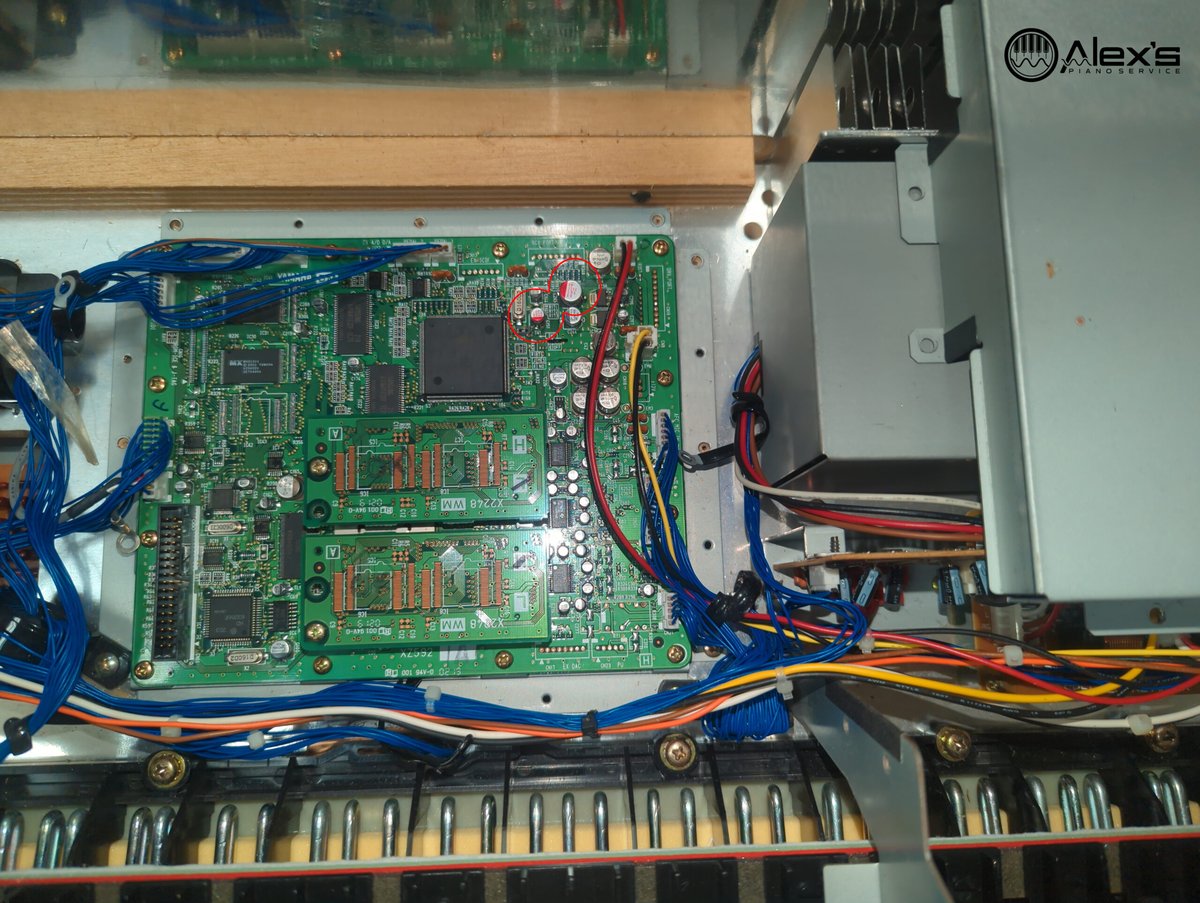
I recently repaired a Yamaha CLP-170 with a startup fault. Replacing the three capacitors identified in Yamaha’s Service News 395 resolved the problem, and the CLP-150 and PF-500 models are also affected.
A startup failure does not automatically mean the piano needs a replacement mainboard. However, similar symptoms can have different causes, so this repair should be matched to the fault rather than applied indiscriminately.
The documented startup problem
Yamaha Service News 395 describes a low-temperature startup failure involving an unstable master clock. The display may remain unresponsive, or the instrument may stop at “PLEASE WAIT”. The bulletin covers the CLP-150, CLP-170, and PF-500.
Which capacitors should be replaced?
Yamaha specifies three capacitors on the DM mainboard: C120, C151, and C245. The bulletin gives the following changes:
| Location | Original capacitor | Yamaha’s replacement |
|---|---|---|
| C120 | 100 µF, 4 V | 68 µF, 4 V OS-CON V9451300 |
| C151 | 100 µF, 4 V | 68 µF, 4 V OS-CON V9451300 |
| C245 | 220 µF, 4 V | 150 µF, 4 V OS-CON V9452200 |
The lower capacitances are Yamaha’s specified replacement values. Use the bulletin’s location photograph alongside the board markings.
Identify the components by their board reference numbers and confirm polarity before removal. Two of the capacitors are visible toward the top right of the board, and are circled in the picture above. The remaining capacitor is hidden beneath the daughter boards.
Why the capacitor type matters
This is not simply a matter of matching the number of microfarads printed on the old capacitor. Yamaha explicitly specifies OS-CON replacements for this modification.
As Panasonic explains, modern OS-CON capacitors use a solid conductive-polymer electrolyte and have low equivalent series resistance, or ESR, with relatively little ESR change at low temperatures. That temperature behavior is relevant to the fault described in Yamaha’s bulletin.
I would follow the specified modification rather than install ordinary electrolytics merely because their capacitance and voltage ratings look suitable. Nor would I assume that the lowest possible ESR is automatically best: regulator stability can depend on the output capacitor’s ESR.
Replacement capacitor sources
A repair-specific set
Becketts Music lists a capacitor set specifically for the SN395 repair. Its listing identifies two 68 µF capacitors for C120 and C151, and one 150 µF capacitor for C245. It also links directly to the Yamaha bulletin. This is the most directly matched purchasing link for the documented repair; confirm the supplied parts and current availability with the seller.
Individual OS-CON parts to evaluate
For technicians sourcing individual components, the following Panasonic parts match the bulletin’s nominal capacitance and voltage. They are sourcing candidates, not verified drop-in replacements or Yamaha-approved cross-references. Confirm the land pattern, terminal reach, package clearance, and electrical suitability before substitution.
| Position and quantity | Panasonic candidate | Specifications and purchasing |
|---|---|---|
| C120 and C151 Two required |
4SVP68M 68 µF, 4 V 60 mΩ ESR |
Panasonic specifications DigiKey listing |
| C245 One required |
4SVPC150M 150 µF, 4 V 30 mΩ ESR |
Panasonic specifications DigiKey listing |
Both Panasonic candidates have a 5 mm body diameter and a listed body length of 5.9 mm. A smaller component is not necessarily a mechanical drop-in for a larger original footprint.
Why I don’t start with a full recap
For a fault with a specific manufacturer modification, my starting point is that modification. Replacing every electrolytic on the board adds work and additional opportunities for rework damage without establishing that the other capacitors caused the symptom.
That is not a reason to ignore leakage, corrosion, abnormal measurements, or unrelated audio and power problems. Those findings can justify a broader repair. The distinction is between replacing components because the evidence supports it and replacing them simply because they are present.
Repair and verification notes
This is a mains-powered instrument and a surface-mount electronics repair. Disconnect it from the outlet before disassembly, and have a qualified technician establish that the circuitry is safe to handle. Becketts’ repair-set listing also cautions against undertaking this work without appropriate electrical and surface-mount repair skills.
- Document the board. Photograph the connectors, cable routing, capacitor references, and polarity markings before disturbing anything. Although these connectors are all unique sizes, it’s very helpful to have a reference. The board will not function properly if the daughter boards are put in the wrong positions.
- Carry out the targeted replacement. Use suitable desoldering equipment and inspect the exposed pads before fitting the replacements. Do not pull components away while their joints remain attached.
- Inspect before powering up. Check polarity, solder bridges, pad damage, and connector placement.
- Verify more than one successful start. Check normal operation and repeat startup tests after the instrument has returned to room temperature. A board still warm from soldering is not an adequate test of a temperature-sensitive fault. This issue often doesn’t show up until after multiple cold starts.
In this CLP-170, the three-capacitor repair resolved the startup problem. That result supports the targeted repair for this instrument; it is not a guarantee that every piano with a similar display symptom has the same fault.
Could the piano already have the modification?
The bulletin’s production cutoffs are 603720 for CLP-170, 602542 for CLP-170M, and 602485 for CLP-170C. Do not apply one model’s cutoff to every suffix. Inspect the installed components as well, particularly when the instrument’s repair history is unknown.
References and related discussions
Yamaha Service News 395 – Manufacturer bulletin, hosted by Becketts Music, with the specified modification and component-location illustration.
Panasonic: OS-CON capacitors – Manufacturer background on the technology, ESR, and temperature characteristics. Individual component specifications are linked in the parts table above.
Becketts Music: SN395 capacitor set – Repair-specific parts listing and safety guidance.
Synth-Parts: CLP-150 startup faults – A repair company’s discussion of the related model hanging at its startup screen. It does not provide the three-capacitor specification.
AskElectronics: Troubleshooting a Yamaha CLP-170 – An owner discussion of startup symptoms and diagnostic possibilities, including power-board solder joints. Useful context, but not a replacement for Yamaha’s service documentation.
Texas Instruments: LMS8117A capacitor selection – Manufacturer guidance illustrating why capacitor ESR must be considered when evaluating substitutions.
Need help with a Yamaha digital piano?
I repair Yamaha digital pianos through Alex’s Piano Service LLC in Southern Maine. Contact me about a repair with the complete model number, serial number, and a description of what happens when you turn the instrument on. A photograph of the display can also be helpful.
For broader troubleshooting, see my digital piano and keyboard FAQ.