I recommend customers with worn-out floppy disk drives upgrade them to “Floppy Disk Emulators.” There are a couple of these on the market. However, the easiest to install and use is the Nalbantov USB Floppy Disk Emulator. I install these regularly in Yamaha Disklaviers. If you order from Nalbantov directly, make sure to use the code AlexPiano for a 5% discount on orders from Nalbantov.
Purchasing a Nalbantov for your Disklavier
Some links in this article are affiliate links. As an Amazon Associate I earn from qualifying purchases. Your click fuels hours of reviewing old service manuals—at zero added cost to you.
I’ve put together a list of the common models and matched them to their Amazon pages. Select your model from the list below!
| Group | Models |
|---|---|
| DKW / PPC / MX90 | |
| DKC5R / MX80 / MX85 | |
| MX100 series | |
| Mark II / DKC55 / DKC60 | |
| DKC500 / DKC100XG |
Why Upgrade?
There are several reasons why you might want to replace an old floppy disk drive with a USB floppy disk emulator, including:
- Increased reliability: USB floppy disk emulators are more reliable than traditional floppy disk drives. They have no moving parts and are less susceptible to mechanical failure. Most customers reach out to me after their floppy disk drive has failed.
- Compatibility & Convenience: USB floppy disk emulators are compatible with modern computers. Most of my customers no longer have floppy disk drives built into their computers!
- Cost-effectiveness: USB floppy disk emulators are often more cost-effective than purchasing a new floppy disk drive or repairing an old one. Even if you can find a suitable floppy disk drive, compatible drives typically sell for hundreds of dollars! And then you have to purchase floppy disks, which are increasingly difficult to obtain.
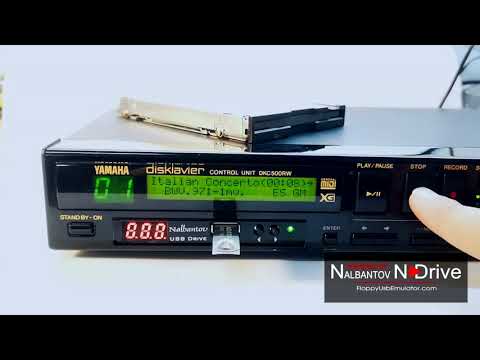
Operation
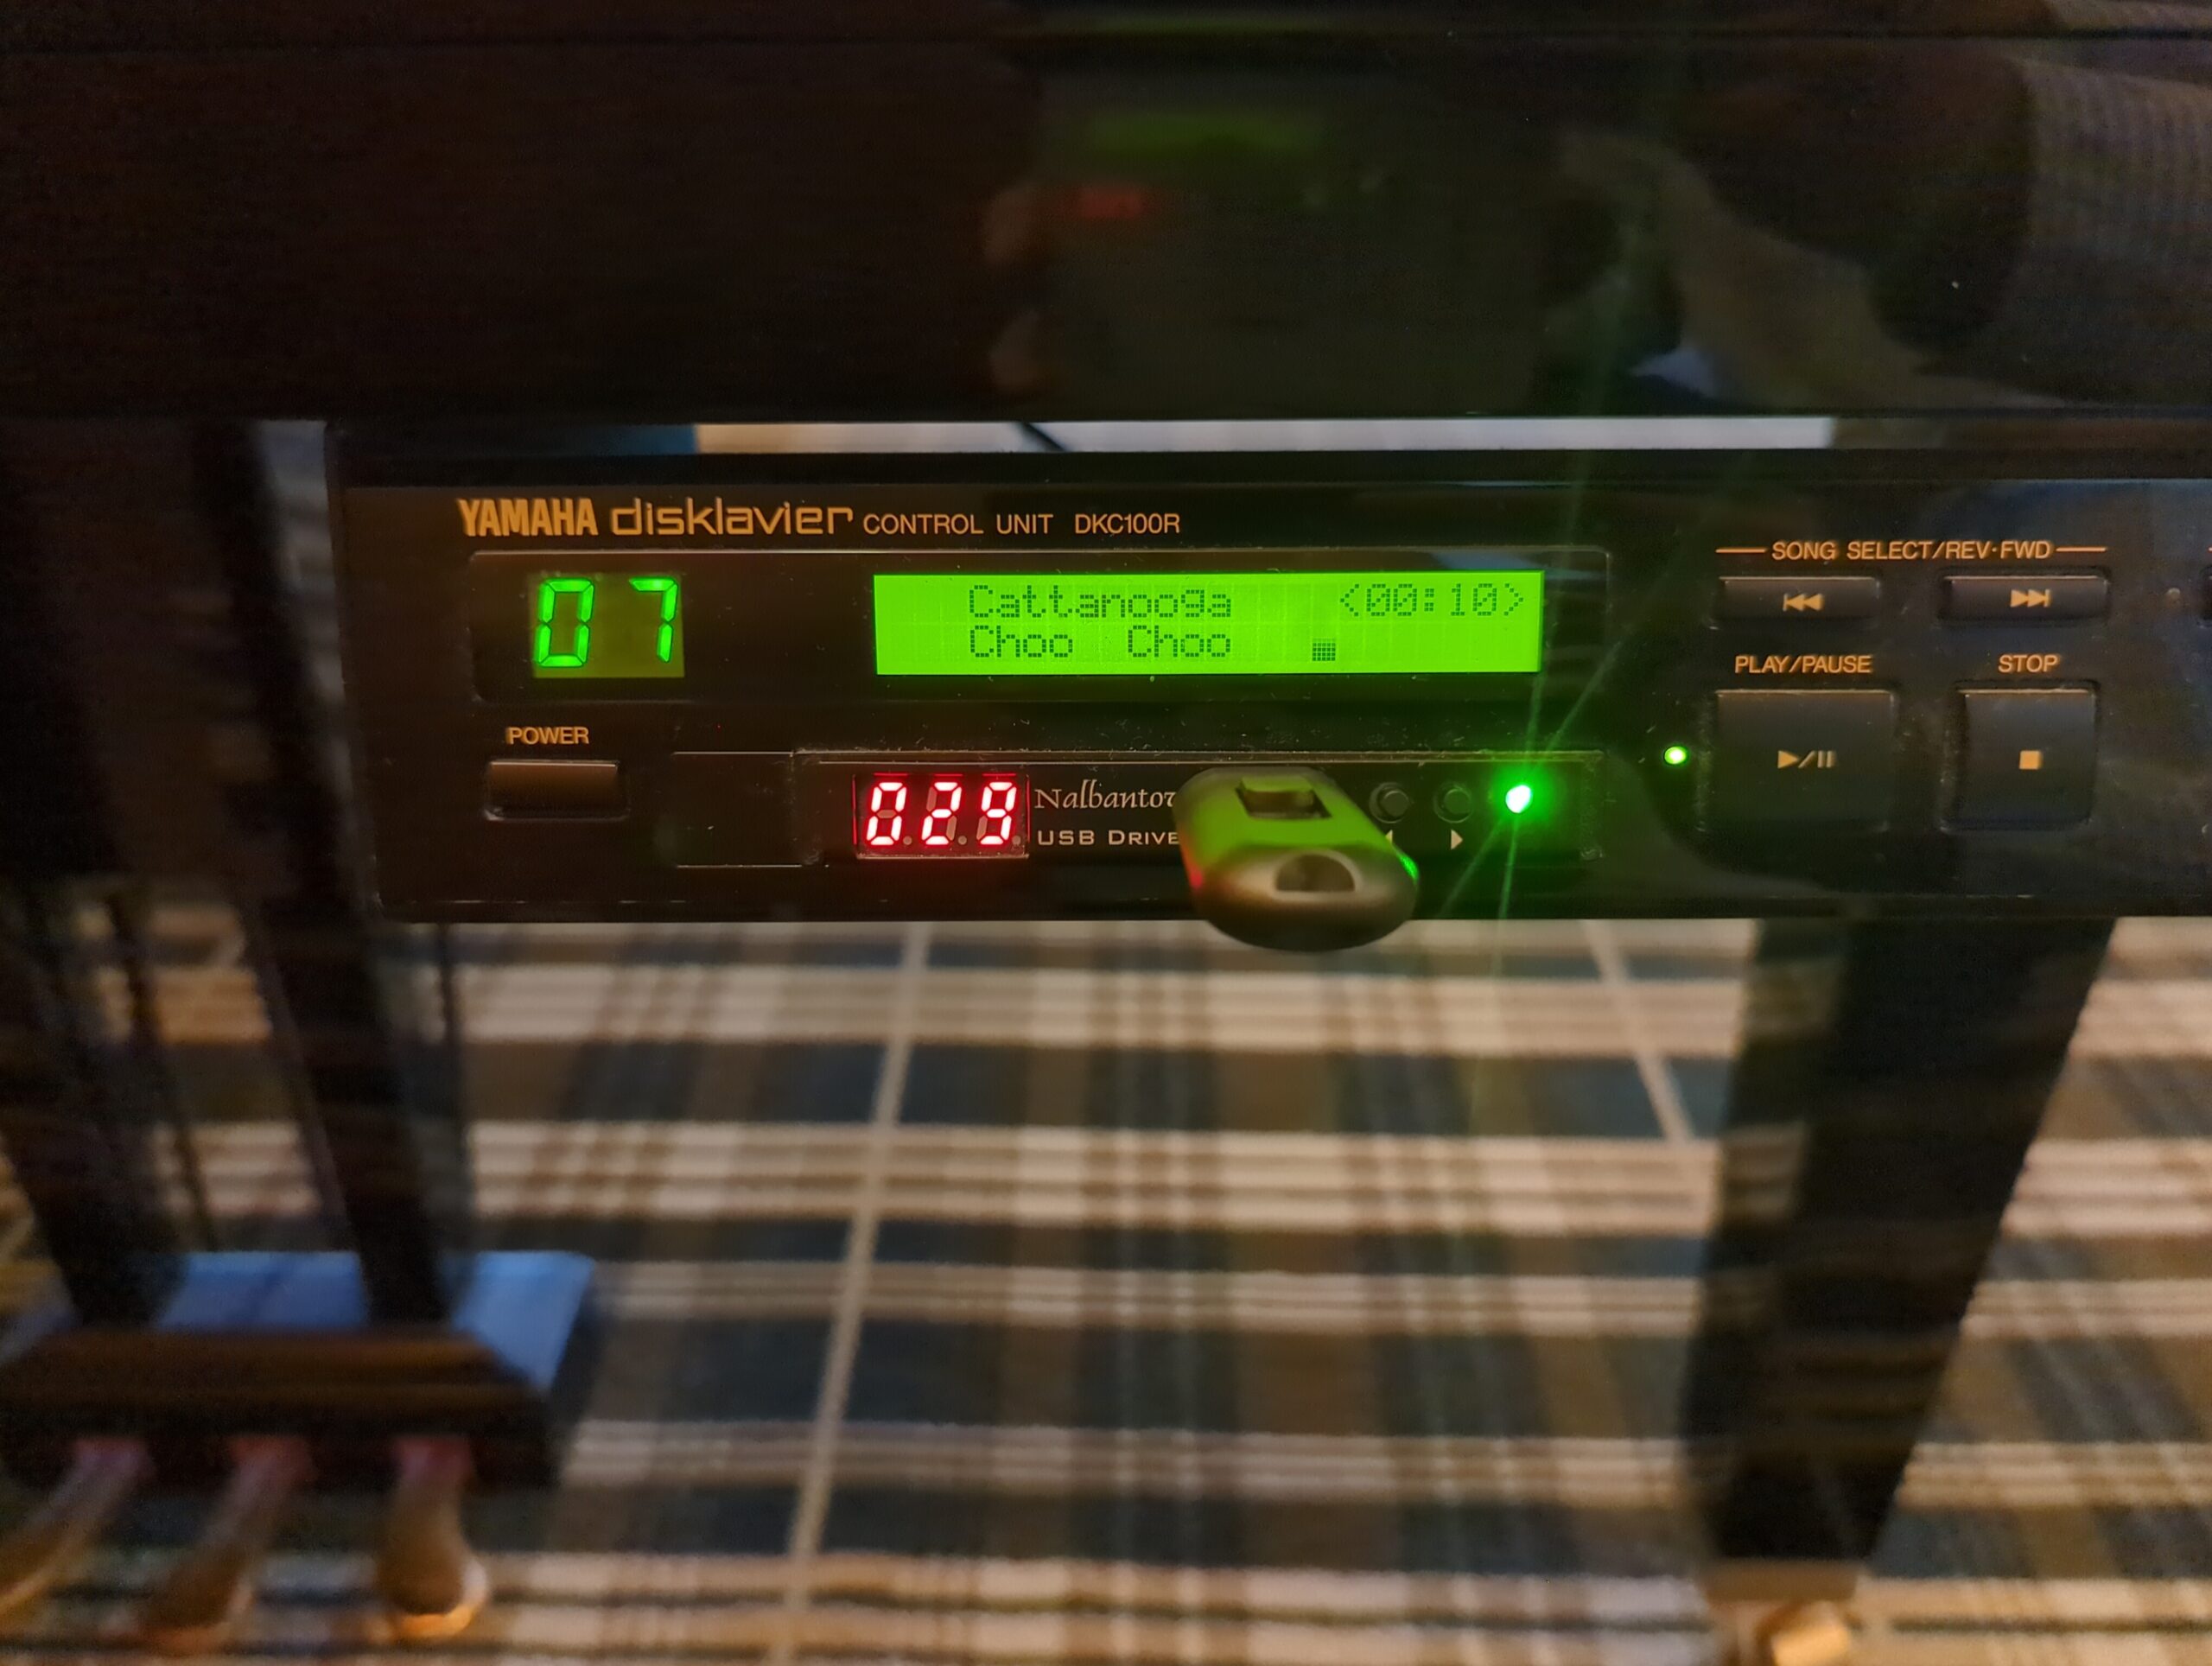
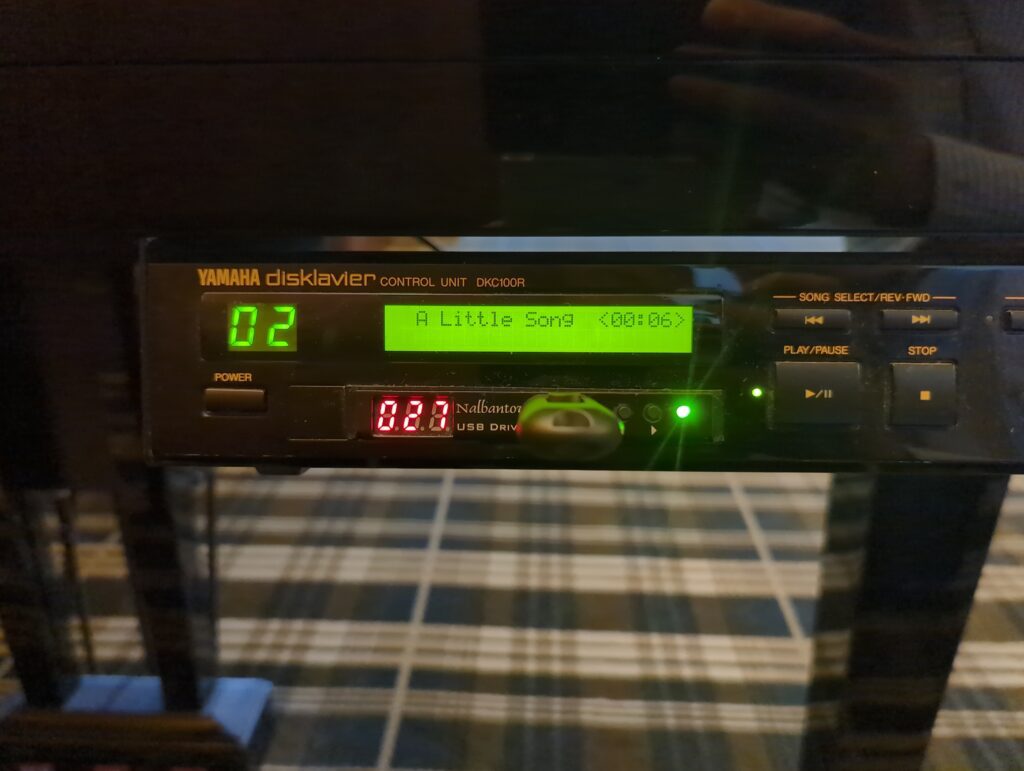
You can use a single Nalbantov USB stick to represent up to 1000 floppy disks. Because it’s a floppy disk emulator, the Disklavier actually believes you’re inserting a different floppy disk. As you switch between virtual “disks” by pressing the arrows, you’ll see the display on the Disklavier behave as though you’ve inserted a new disk. Of course, if you have more than 1000 floppy disks, you can invest in another USB stick, although I haven’t run into this particular situation yet!
Installing the Nalbantov
Some customers opt to install the Nalbantov unit themselves. Depending on the design of Disklavier, this is quite doable, although I don’t recommend attempting it with most Yamaha MX-100II Disklaviers (see below). It is a very easy installation on, for instance, the DKC-5R and the DKC-500RXG, just to pick a couple of examples. See my guide to installing the Nalbantov in the DKC-500RXG here.
With some generations of Disklavier (most notably MX100II devices), the floppy disk drives are mounted behind a shaped plastic piece. In these cases, you’ll need to cut away the old plastic facing (a pair of flush-cut nippers is helpful here), install the new drive, and put some kind of buffer around it. I’ve experimented with a few different choices for something functional and attractive. Purchasing neoprene strips is a cheap solution.
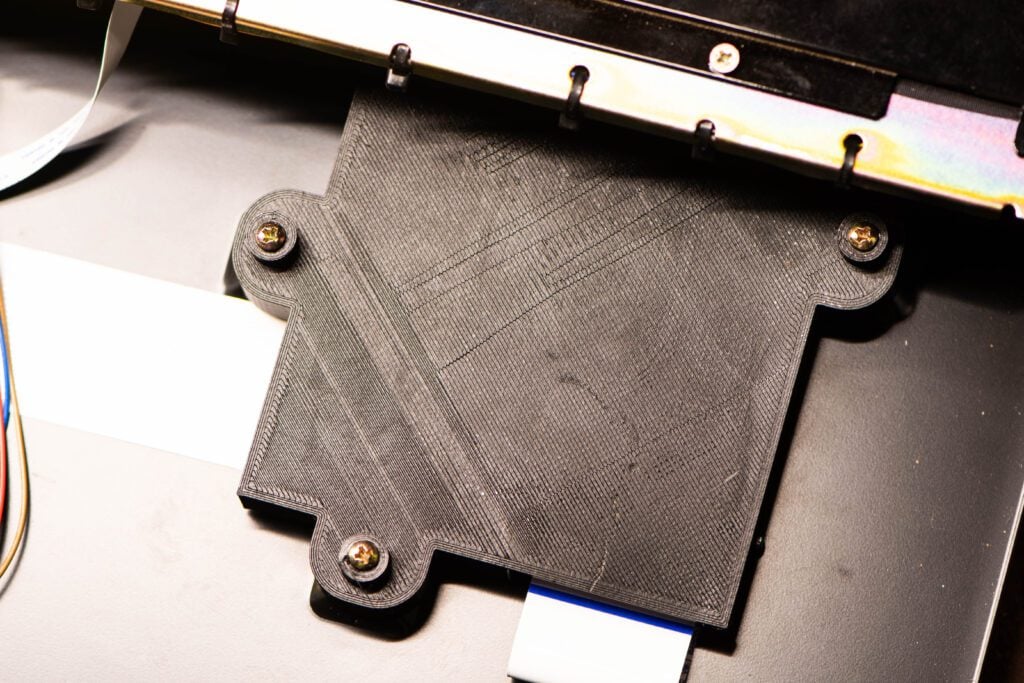
New solution: I have a 3D model of a floppy bezel that’s sized to fit around a Nalbantov. You can 3D print this yourself, or I can mail you one. This mount holds the Nalbantov in place, and also fills in the gaps around the edges. It’s an all-in-one solution for mounting the Nalbantov, and allows you to reuse the same screws the original floppy disk drive was installed with.
For backing up your current Disklavier floppy disks to a format that can be stored on your USB stick, see my article on Backing up Disklavier Floppy Disks. They can then be moved onto a virtual “disk” with Nalbantov’s proprietary tool.


You don’t happen to have the files that are needed on the USB stick (the floppy disk emulator) for the Nalbantov USB Drive N-Drive 100 – FE5? The USB drive they sent me is defective and they do not provide a download link to get the files to create a new one. I work in IT and have dozens on thumb drives lying around.
Of course, it would be ludicrous to order a $25 replacement USB from them. Thanks in advance for any help you might provide?
Hello Matt,
I’ve replied by email. Although it appears they based their software on the open-source HxC Floppy Drive Emulator, I couldn’t find any licensing information about it, and so didn’t want to post a public link.
Thank you!
Can I use this to replace the floppy on an Allen C6 organ?
It’s very likely that you can use a floppy disk emulator in an Allen C6. However, I would first check with your nearest Allen organ technician. Allen has truly exceptional repair support, and supply parts for their organs almost in perpetuity, so it’s worth checking to see what their recommendations are.
Otherwise, Nalbantov advertises that they can custom match a floppy disk emulator. They’ll need pictures of the old floppy disk drive, including of the cable connector and of any jumpers on the drive. They have a form on their website to check for compatibility.
Hi, my Yamaha piano is an upright MX100II (48″) with a floppy disk player system. I wonder if I could upgrade the system by replacing the floppy drive part only, and where do I find the part.
Thank you for your advice.
PS: Please email w topic “PIANO, Disklavier”
The USB floppy disk such as the Nalbantov is an upgrade, but with the MX100II, it’ll require some physical modification to fit the drive in. I have a 3D-printed insert that I use to fit the Nalbantov into such instruments. This will allow you to have “virtual” floppy disks, so it won’t get you new content on its own, but will make it easier to copy content to and from the piano.
If you want to add new content altogether, it’s worth considering something like the Yamaha BT-01 that will let you control the piano over Bluetooth. See PianoStream for more information on that.
can the Nalbantov usb emulator replace the floppy disc drive on a Yamaha
Clavinova cvp 309/307? Will the piano play the music as if were actually
playing from the floppy disc?
Thanks for your help
Hello Herb! The CVP-307/309 doesn’t use an internal floppy disk drive. It has an external USB drive, plugged in by USB cord. It’s mounted to the case, so it looks like it’s part of the Clavinova, but it’s actually a separate unit. See the below picture from the service manual:
In your case, your Clavinova actually has a USB port. I’d advise transferring your old floppy disks to a USB stick. You can either do this using the techniques described on this page, or I can transfer them for you.
If you’re looking for a replacement drive, you can often find them on eBay. To the best of my knowledge, Nalbantov doesn’t manufacture a USB plug-in version of their drive.
I have a Yamaha Disklavier DGT2A purchased in 2002. It uses floppy and cd disks. Is there any upgrade available that will allow me to download music?
Hello Marlene! I’d highly recommend looking into PianoStream. This is a very easy addition to the DGT2A, and I have a full article on installing and using PianoStream here. Although the app is primarily designed for PianoStream streaming service, it also allows you to play any MIDI files directly to the piano from your phone—these are the files you’d download from services like Yamaha PianoSoft. You can download any Yamaha PianoSoft Solo albums and stream them right to your DGT2A from your PianoStream app, and the keys will move and play along just as they should.
Alternatively, you can look into options such as the QRS PNOmation 4. This is a considerably larger expense, but gives you a variety of modern options. I have a fuller article on Yamaha Disklavier upgrade options here, and your piano would fall under the Older Disklaviers category. Please let me know if you have any questions though!
Thank you!
Thank you for a great article on the Nalbantov emulators…I have been researching their N-Drive 1000 emulator for Korg for my Korg N264…I am little hesitant on installing it even though it’s plug and play…does this installation force to reload programming already on the keyboard as I have customized many programs…I can get the reset programming from Korg (I have the zip file) but I would like to avoid recreating my customization…anyway…thanks for some really good info
Hello Patricia,
Thanks for reaching out! The good news is that you can safely replace the floppy disk drive with a Nalbantov without causing any issues to the programs saved on the Korg.
However, I will add that those settings are saved on a battery-backed memory chip. It’s a coin-cell battery (a CR2032)—so named because it looks a lot like a little coin. When you open up the Korg to replace the floppy disk drive, you might see it. When that battery is replaced or dies, user data will be lost. Normally you’ll get a “Low Battery” warning first.
If you do want to be safe before opening it, or if you do see the “Low Battery” warning, you can back up those patches. I understand SysEx Librarian on Mac is an effective tool for backing up N264 patches, or Sound Tower’s N-Edit works on Windows.
Mi sai dire se il tuo Nalbantov N‑Drive eXtreme può sostituire il mio floppy (codice C9121631). montato su Yamaha MX100MR
Can you tell me if your Nalbantov N‑Drive eXtreme can replace my floppy disk (code C9121631) mounted on a Yamaha MX100MR?
Ciao Dante!
Sì, Nalbantov produce un modello che funziona con lo Yamaha MX100MR.
Puoi acquistarlo direttamente da loro. Producono tre versioni diverse:
Il N-Drive 100, il N-Drive 1000, e il N-Drive eXtreme. Funzioneranno tutti con il tuo piano.
Il N-Drive 100 permette di salvare fino a 100 “floppy virtuali” su una chiavetta USB, mentre il N-Drive 1000 permette di salvarne 1000. Il N-Drive eXtreme ha un piccolo display OLED ed è l’opzione più facile da usare.
Hello Dante!
Yes, Nalbantov does sell a model that fits the MX100MR.
You can purchase it directly from them. They make three different versions:
The N-Drive 100, N-Drive 1000, and N-Drive eXtreme. They will all work for your piano.
The N-Drive 100 allows you to store 100 “virtual floppy disks” on a USB stick, whereas the N-Drive 1000 allows you to store 1000. The N-Drive eXtreme has a small OLED display and is the most user-friendly option.
Thank you!
Mi puoi se va bene cosa costa? Can you tell me if it’s okay and how much it costs?