This guide covers the simplest APS MIDI Prep Tool workflow: You already have MIDI files saved on your computer, and you want to clean them up before copying them to a Disklavier, USB stick, floppy emulator, or other player piano system.
APS MIDI Prep Tool can do several more advanced jobs, including working with floppy images, E-SEQ files, and PIANODIR.FIL. This page is intentionally narrower than that. We are not starting from a floppy disk here. We are starting with .mid or .midi files that are already on your computer.
What this workflow is for
This workflow is useful when you have a folder full of MIDI files and the names are too long, too messy, or not friendly to older playback systems. It is especially helpful when preparing files for older Disklaviers or floppy-style workflows, where short, simple filenames are often more reliable.
There are two different kinds of “names” to keep in mind:
- The MIDI title is metadata stored inside the MIDI file. This is often what a Disklavier or player system displays on its screen. This is what most people are concerned about, since you cannot easily modify this field with most common tools.
- The filename is the name you see in Windows, macOS, or Linux, such as
My Favorite Song.mid.
APS MIDI Prep Tool lets you deal with both. If you only need short filenames, you can use the Rename 8.3 feature. If your piano is showing blank, incorrect, or awkward song names, you may also want to edit the title column before saving.
Before you start
I strongly recommend making a copy of your MIDI folder before doing any bulk renaming. Even when a tool is designed to be careful, it is always better to experiment on copies than on your only archive.
- Create a new folder, such as
MIDI Working Copy. - Copy the MIDI files you want to rename into that folder.
- Keep your original folder untouched until you have tested the renamed files.
You can also check Backup before saving, which will create backups (stored with _backup in the filename) before modifying the file.
This is especially important if the files came from an older disk, a customer archive, or a rare collection. Test a few renamed files on the actual playback system before spending time preparing hundreds of songs.
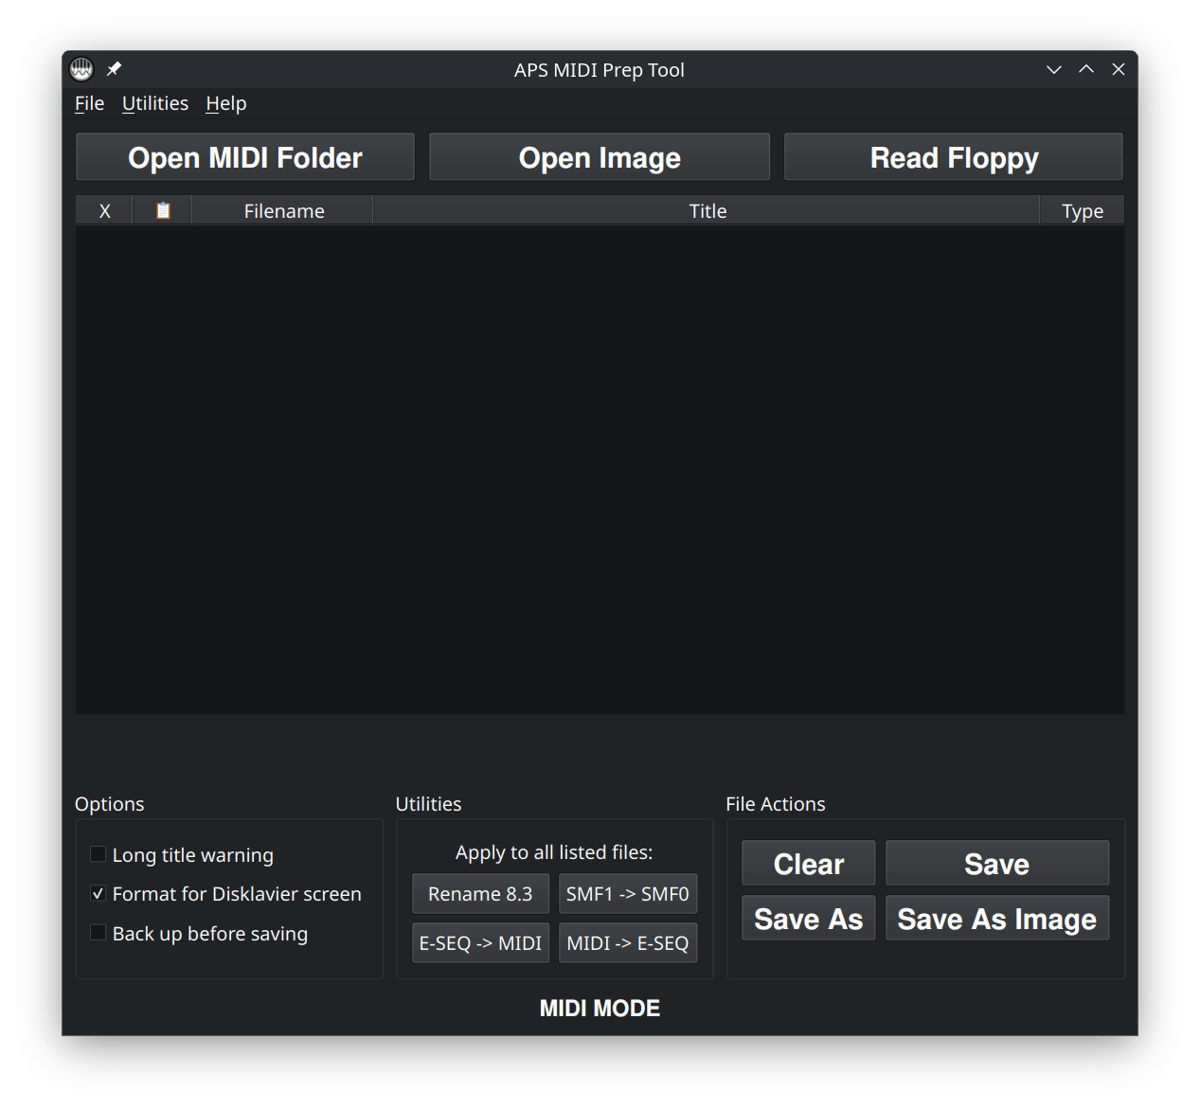
Step 1: Open APS MIDI Prep Tool
Launch APS MIDI Prep Tool. For this workflow, you do not need Open Image or Read Floppy. Those are useful for other jobs, but here we are working with normal MIDI files already stored on your computer.
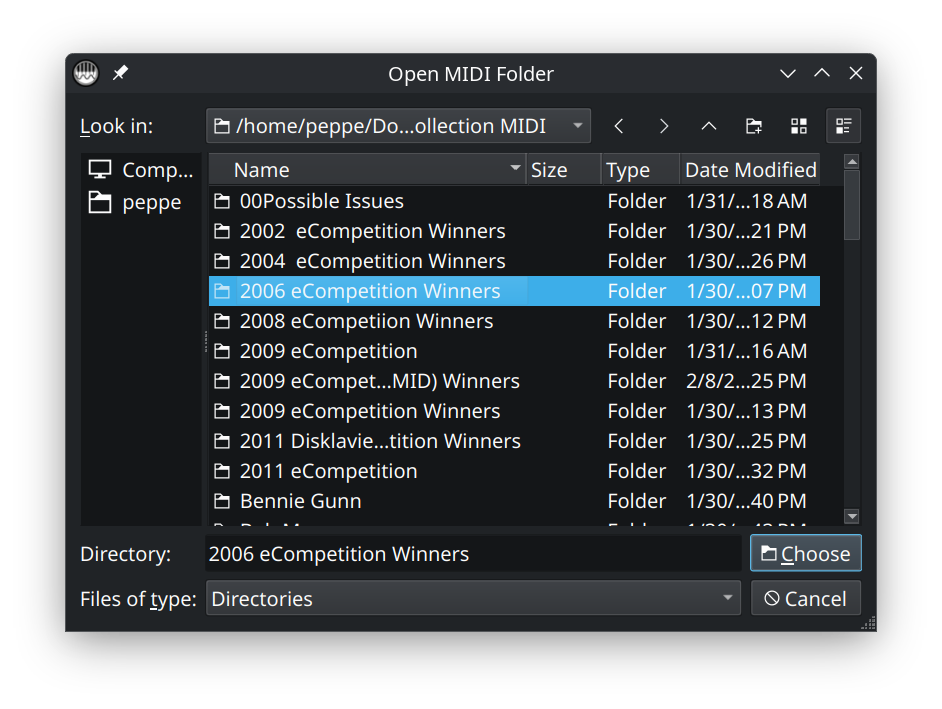
Click Open MIDI Folder and choose the folder containing your copied MIDI files.
Alternatively, you can simply drag and drop your MIDI files into the window.
Step 2: Review the file list
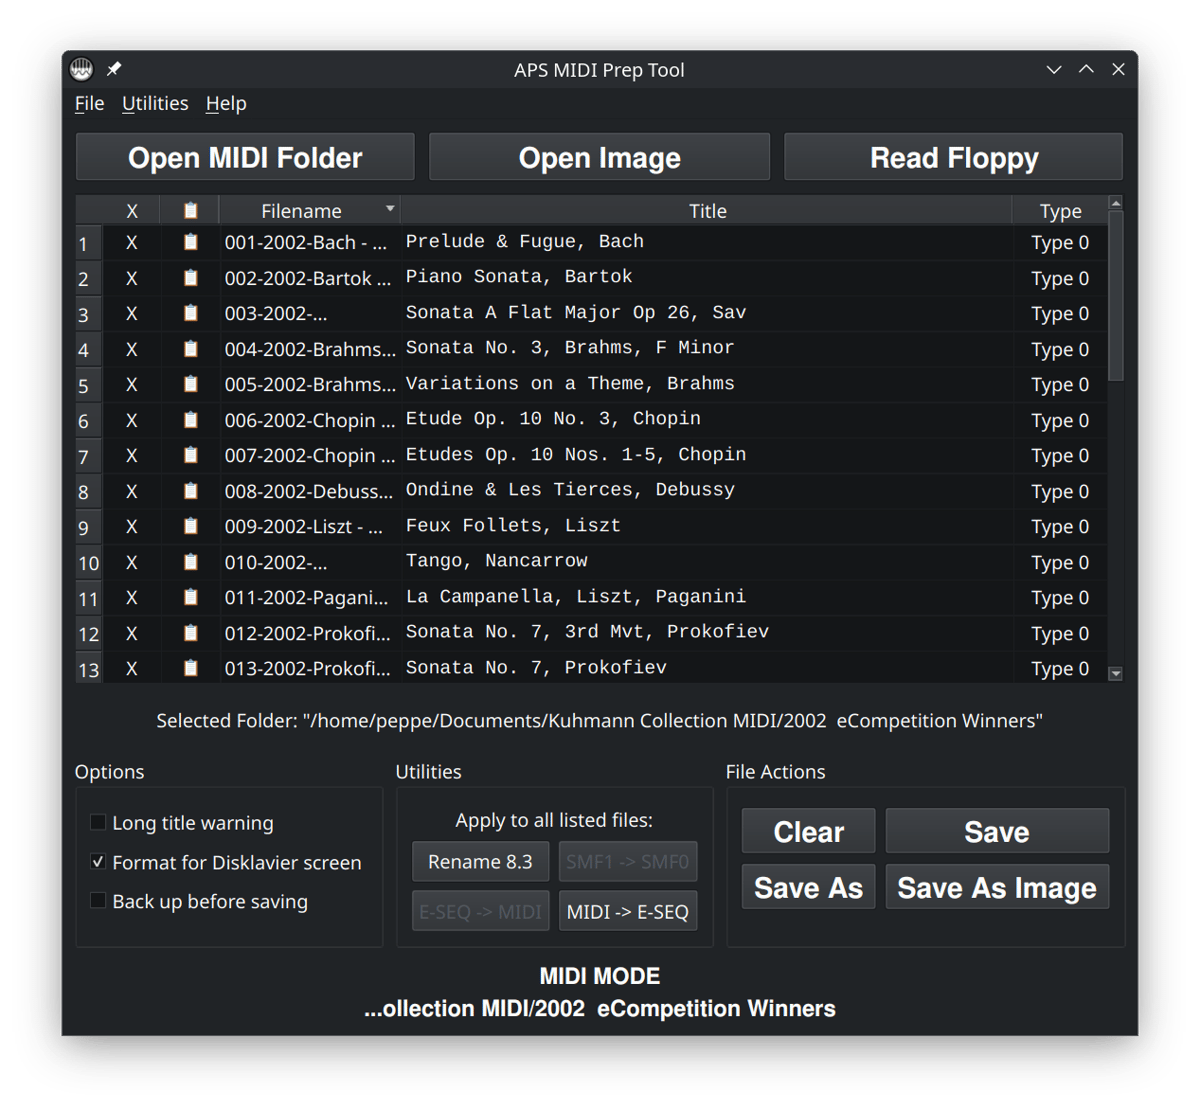
After the folder loads, APS MIDI Prep Tool will show the files in a table. You will see the filename, the extracted title, a long-title warning column, and the detected file type.
This is a good moment to look through the folder and make sure the program loaded the files you expected. If nothing appears, check that the folder contains files ending in .mid or .midi.

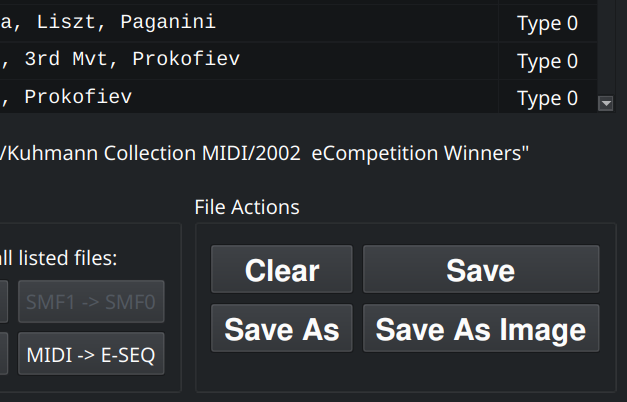
Rename 8.3 and MIDI -> E-SEQ are highlighted. We won’t use these here, but they’re available because APS MIDI Prep Tool is in MIDI MODE.Step 3: Edit the MIDI titles
Renaming the file is not always the same as changing what the piano displays. Some systems look at the filename, while others look at the title stored inside the MIDI file.
If the titles shown in the Title column are blank, too long, or not useful, click a title cell and type the name you want. Keep the title short and plain. For older Disklavier systems, I usually avoid unusual symbols and try to stay within the 32-character warning limit.
When you change titles, the changes are made to the original files when you click Save. You can also click Save As to save the changed files to a new folder, but the originals are left unchanged.
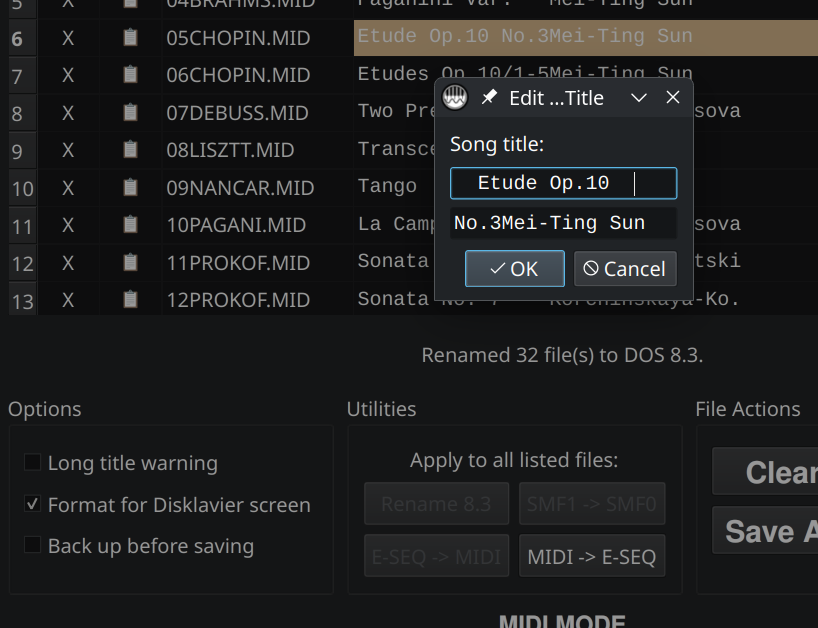
Format for Disklavier screen.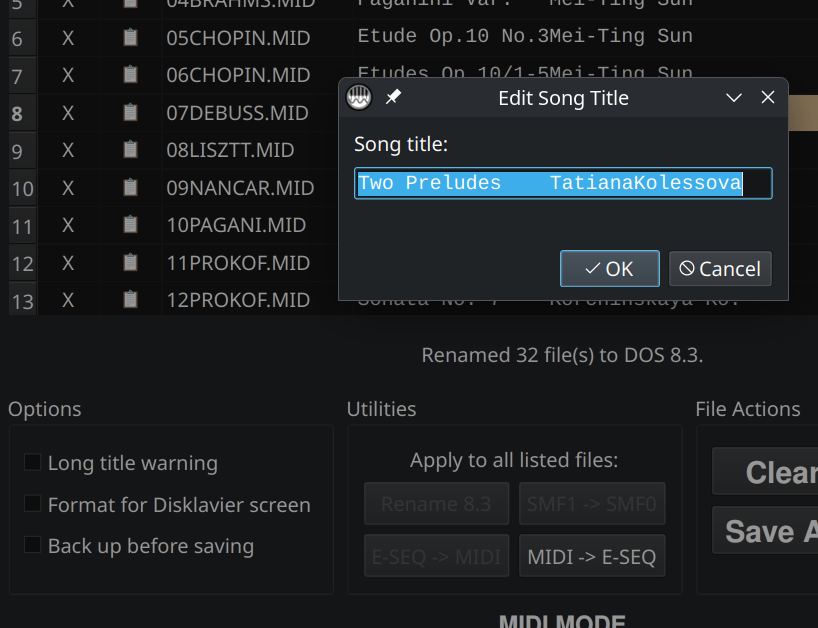
Format for Disklavier screen is unchecked.If you need titles to be kept short (shorter than 32 characters), then check Long title warning. If you see a long-title warning, shorten the title. A long title may still work on a computer, but it can be truncated or displayed awkwardly on older hardware.
Step 4: Save the title changes
If you changed only the filenames with Rename 8.3, that filename change has already been applied to the working folder after confirmation. If you edited the MIDI titles, you also need to save those title changes.
- Use Save to write the title changes to the files in the current working folder.
- Use Save As if you would rather write updated copies to a different folder.
When working with important files, I prefer the cautious approach: work from a copy, save into a clean folder, and then test a few songs on the actual piano or playback system.
Save, which writes the title changes to the original files. You can Save As if you’d rather write the modified files to a different folder. Save As Image creates a new or updated floppy-image file, such as an HFE image for a Nalbantov or Gotek workflow. It does not modify your original MIDI files unless you later overwrite them intentionally.Step 5: Rename the filenames for older systems (optional)
Most users who only want to change what appears on the piano should skip this step. Rename 8.3 is for older systems that need short filenames.
If you are preparing files for a legacy player system, floppy emulator, or older Disklavier workflow, click Rename 8.3. This renames the listed files using short DOS-style filenames.
Important: Rename 8.3 changes the filenames in the current folder immediately. It does not wait for the Save button and it does not create backup files. Use this only on a working copy of your MIDI folder.
DOS 8.3 means a filename with up to eight characters, followed by a three-character extension. A MIDI file using this style will end in .MID. Older systems are often much happier with names like this than with long filenames containing spaces, punctuation, or special characters.
The tool will ask you to confirm before it renames the files. Remember that this changes the filenames in the working folder, which is why I recommend starting with a copy.
You can also find this from the menu under Utilities > Rename All to DOS 8.3. Note that the option is not available if the filenames are already short enough.
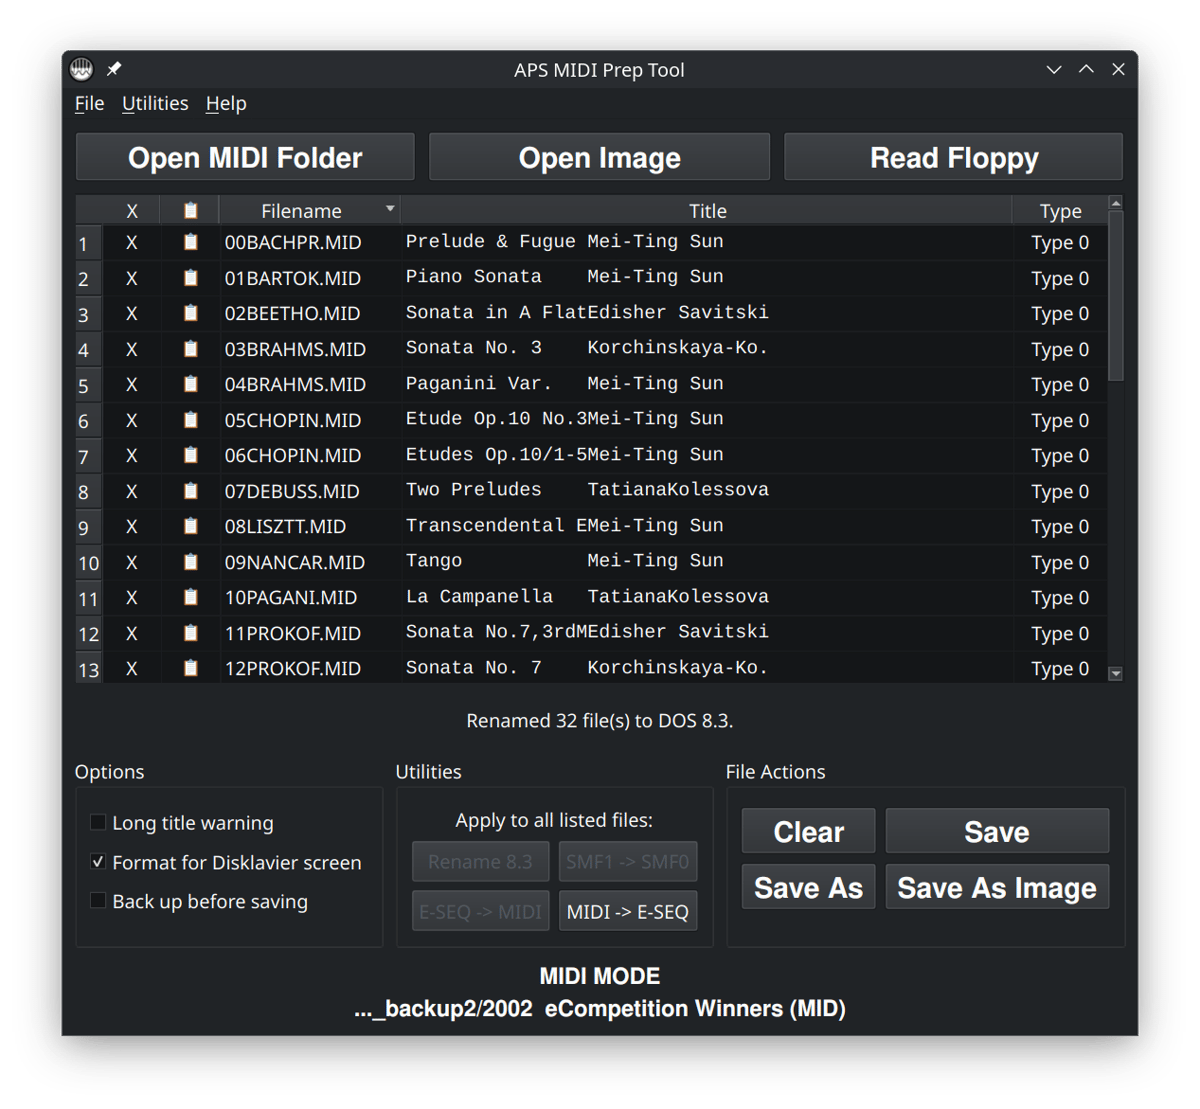
Rename All to DOS 8.3 ran successfully. Remember, this isn’t necessary unless you’re using these files with older systems.Step 6: Copy the renamed files to your playback media
Once the filenames and titles look right, copy the prepared MIDI files to the place you normally use them. That might be a USB stick, a folder used by a floppy emulator, a computer connected to the piano, or another playback system.
I recommend testing a small number of files first. Make sure the piano can see them, that they play correctly, and that the displayed titles are useful. After that, you can prepare the rest of the folder with more confidence.
Save.Common problems
The program did not show any files
Make sure you selected the folder containing the MIDI files themselves. The files should end in .mid or .midi. If the files are inside another subfolder, open that folder instead. Remember you can always drag-and-drop the MIDI files into the window instead.
The filenames changed, but the piano still shows the old names
That usually means the piano is reading the internal MIDI title rather than the filename. Edit the Title column, then use Save or Save As to write the updated titles.
The files play strangely or only play one hand
That is probably not a naming issue. It may be a MIDI Type 1 vs. Type 0 issue. Check the Type column and see if any files are labeled as Type 1. If so, this tool can convert them. If you don’t have access to the tool, you can always use my online MIDI Type conversion tool here.


