As an authorized Yamaha Service Center, I’m often asked how to connect Disklaviers to the local network. I believe this updated approach is quite simple, inexpensive, and will allow for higher connection speeds as Yamaha’s technology advances. This is the approach I trust in my customers’ homes.
Previously, I used Powerline adapters to connect Disklaviers. In those cases, you weren’t technically connecting the Disklavier to Wi-Fi, but were instead bypassing the problem altogether by using the house’s wiring. This is appealing because it’s easy, but it’s not very robust, and it requires that you don’t use a surge protector. In contrast, the approach outlined on this page is highly robust and allows for the use of proper surge protectors.
If you haven’t updated your Disklavier’s firmware since October 2020, it is absolutely necessary to update it before attempting to connect to the internet. Your Disklavier will tell you it can’t connect to Yamaha, regardless of what you do, until the firmware is updated. I have additional information on updating the firmware on the Disklavier E3 (DKC-800 / DKC-850). I can also help with updating the firmware on the Disklavier Mark IV, and can even provide you with the media.
Please note that this article is intended for home networks. It will typically not work on Guest networks. Some readers have tried to use this approach on Guest networks, highly segmented corporate networks, or Isolated Operational Network (IOP) networks. Guest networks often block device discovery, which can prevent the Disklavier and ENSPIRE apps from finding the piano, and they may also block wireless bridging or repeaters entirely. In these environments, a direct Ethernet connection to the network, or assistance from the facility’s IT staff, is usually the best solution.
Supplies
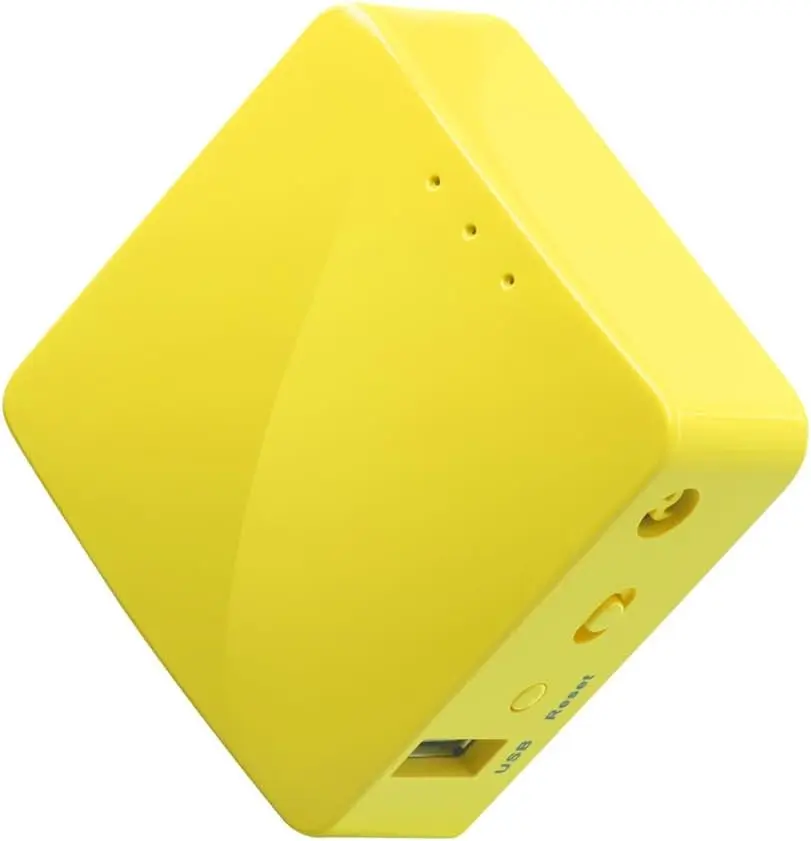
GL.iNet Travel Router (“Mango”)
I recommend the model GL-MT300N “Mango” or similar GL.iNet travel router. Currently, the GL.iNet “Mango” is about $30 on Amazon. This is a high-quality device from a reputable manufacturer, and it exceeds any of the other inexpensive bridges on Amazon in terms of build quality, setup, and reliability. It can also be powered entirely by USB, which simplifies setup. If you have only a 5 GHz network available, please see I Have Only a 5 GHz Network below. GL.iNet describes their bridge setup in their official documentation. Please note also that the Mango uses WPA2. Although rare, some newer routers do not allow for WPA2, and require the newer WPA3 standard.
3M 250 reclosable fastener, 1/2 inch
These 3M reclosable fasteners are dramatically stronger than Velcro. You can mount your GL.iNet “Mango” right onto the control center. It’s the fastest, simplest mounting technique!
Heavy-duty zip ties 24-inch [OPTIONAL]
These are incredibly useful for mounting devices up underneath your grand piano. You can use these in place of the 3M Reclosable Fastener above.
Why connect your Disklavier?
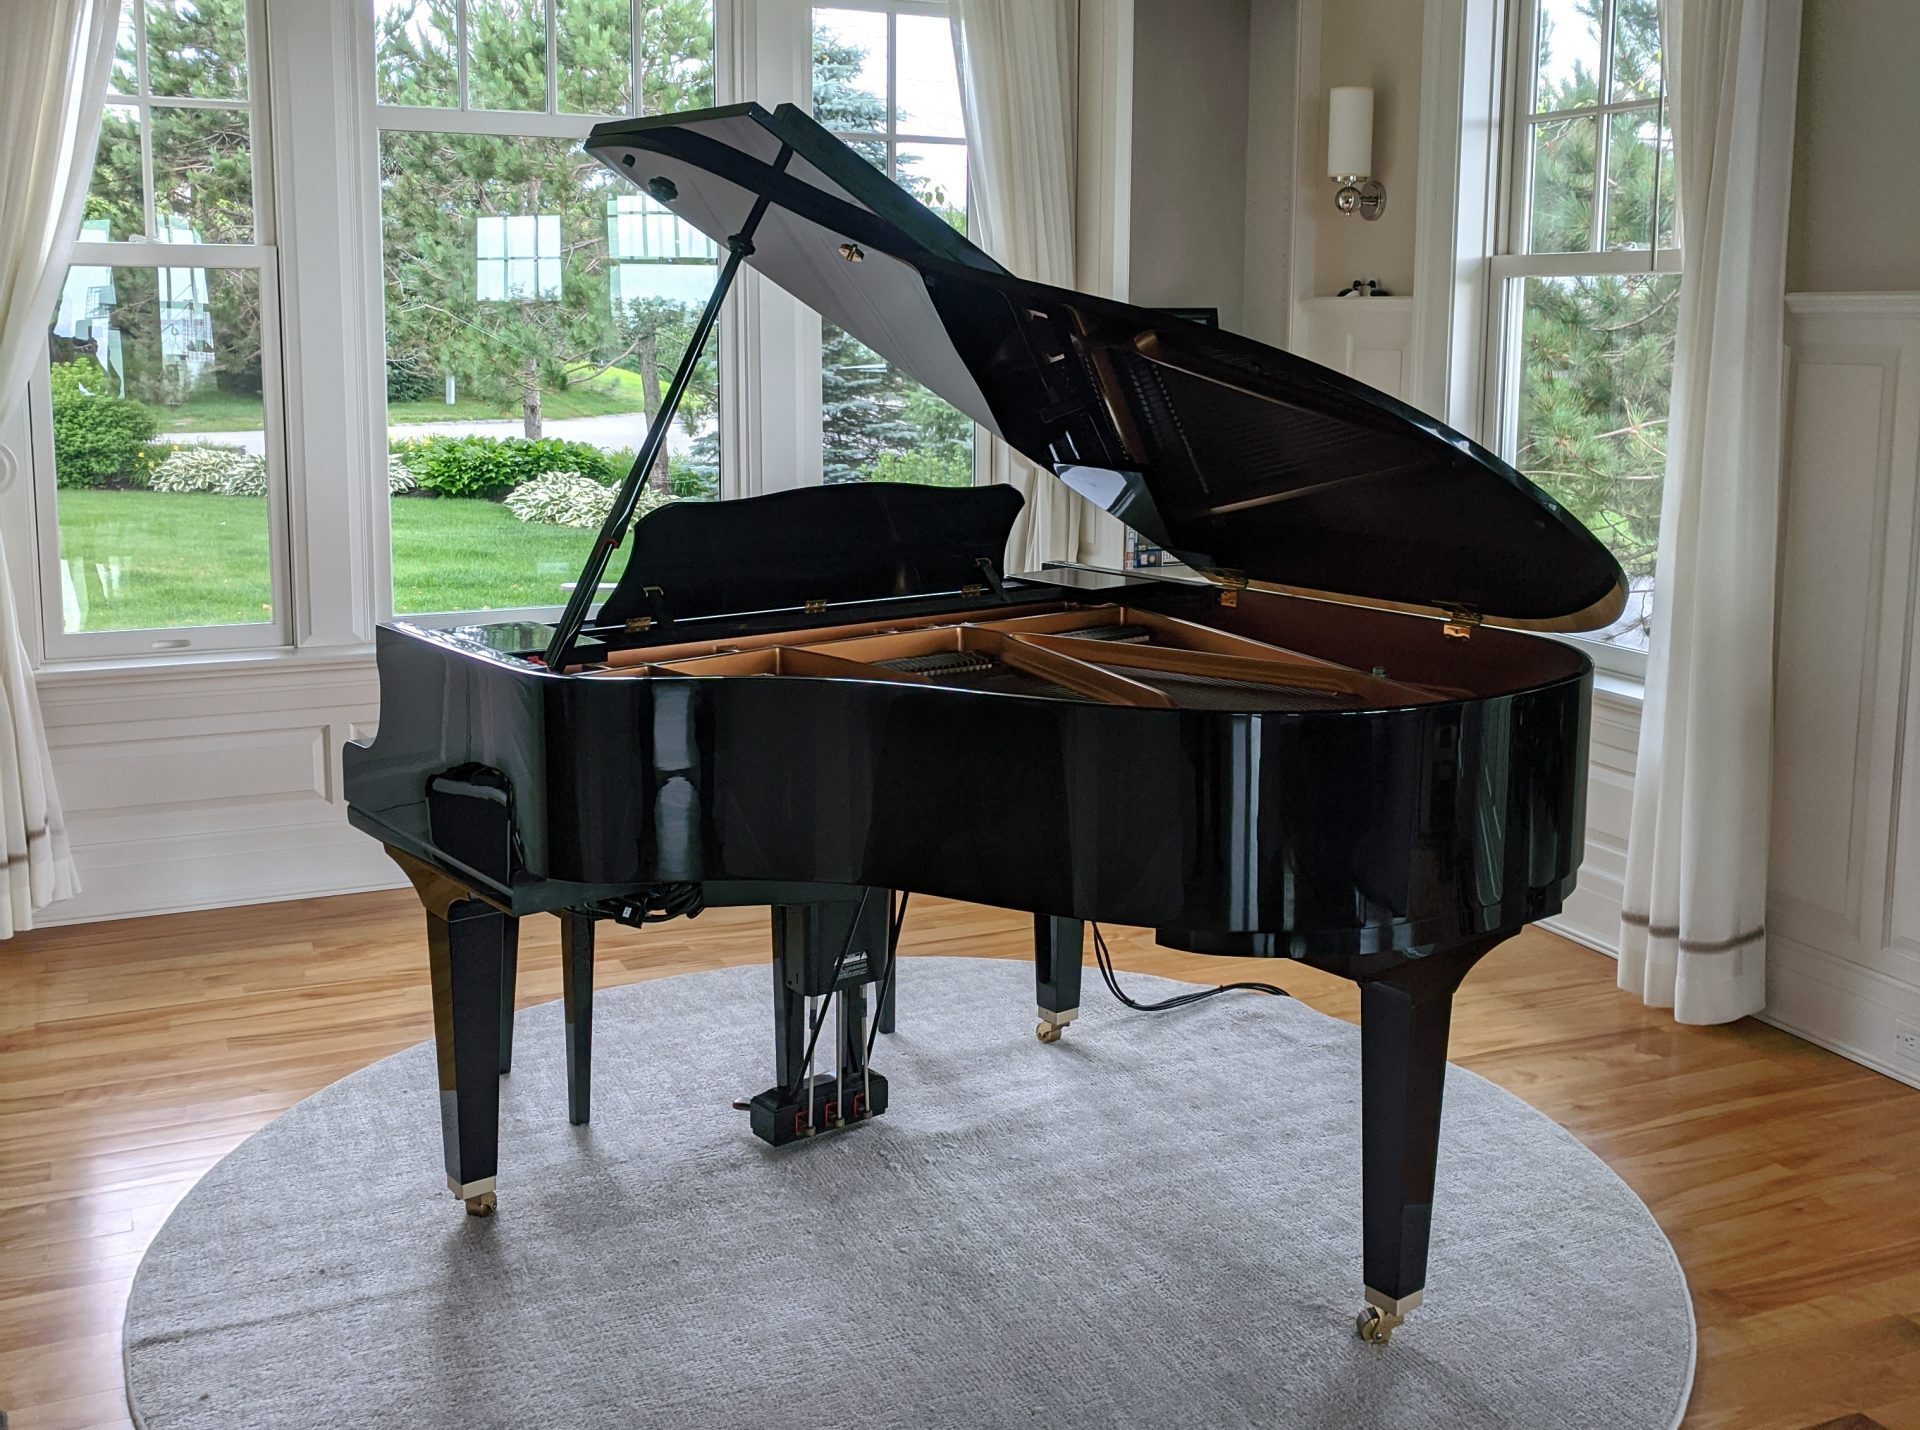
Yamaha Disklaviers bring professional concert performances right to your home. Connecting your piano to the internet unlocks features like streaming performances and automatic updates—but getting it online can be frustrating, especially with Yamaha’s UD-WL01 adapter. If you want to use Yamaha Piano Radio with your Disklavier, but want a simple and reliable setup, read on!
Wireless bridges, however, can provide a solid Ethernet connection to your Disklavier without the headaches of Powerline adapters or other fragile Wi-Fi setups.
Why the GL.iNet travel router?
The GL.iNet travel router connects to your home’s Wi-Fi and delivers a hardwired Ethernet connection to the Disklavier. This means you don’t have to do any special setup on the Disklavier, or figure out how to use the UD-WL01.
I recommend the GL.iNet “Mango” model—it’s affordable, compact, and highly reliable. It’s also powered by USB! There are numerous wireless bridges that are a few dollars cheaper; however, the bridges in this price range are notoriously finicky.
Choose a reliable bridge. Defective, low-quality bridges can cause problems, and some even introduce so much noise to your local Wi-Fi as to slow down your internet on other devices.
Can the Mark IV, E3 or ENSPIRE really power it over USB?
You’re right to ask! The Mark IV uses USB 1.1, and both the E3 and ENSPIRE use USB 2.0. None of these can provide more than about 2.5 watts of power. That’s not very much power! There are other articles on the internet recommending the use of USB powered bridges that these units simply can’t power reliably, leading to periodic lag and drop-outs.
Not so with the Mango. Real-world tests of the Mango find its power consumption is very low. The Tech Obsessed blog found it used ~1.3-1.5W during normal operation. Provided you don’t enable the VPN function—which isn’t appropriate in this context anyway—the power consumption is so low that even a Mark IV can power it! Maximum power draw with the VPN is higher, so when powering the Mango from a Disklavier’s USB port, it should stay disabled.
Installation and connection
You’ll need a laptop, desktop, or smartphone to prepare the GL.iNet for use with your piano. You can do this after the unit is installed up underneath the piano, or you can do it ahead of time with the unit set up where you can easily reach it. Once you’ve connected it to your Wi-Fi network, it will stay connected even if you power it off and move it.
Please do not connect your Mango to Wi-Fi during the initial setup, or change any other settings at this point. You’ll connect to your Wi-Fi network after switching the Network Mode to Extender. See below.
1. Configure the GL.iNet router
Power up the GL.iNet router near your main Wi-Fi router.
Using a laptop, desktop, or smartphone, connect to its network (the network might be named something like GL-MT300N-XXX).
Visit 192.168.8.1 in your browser.
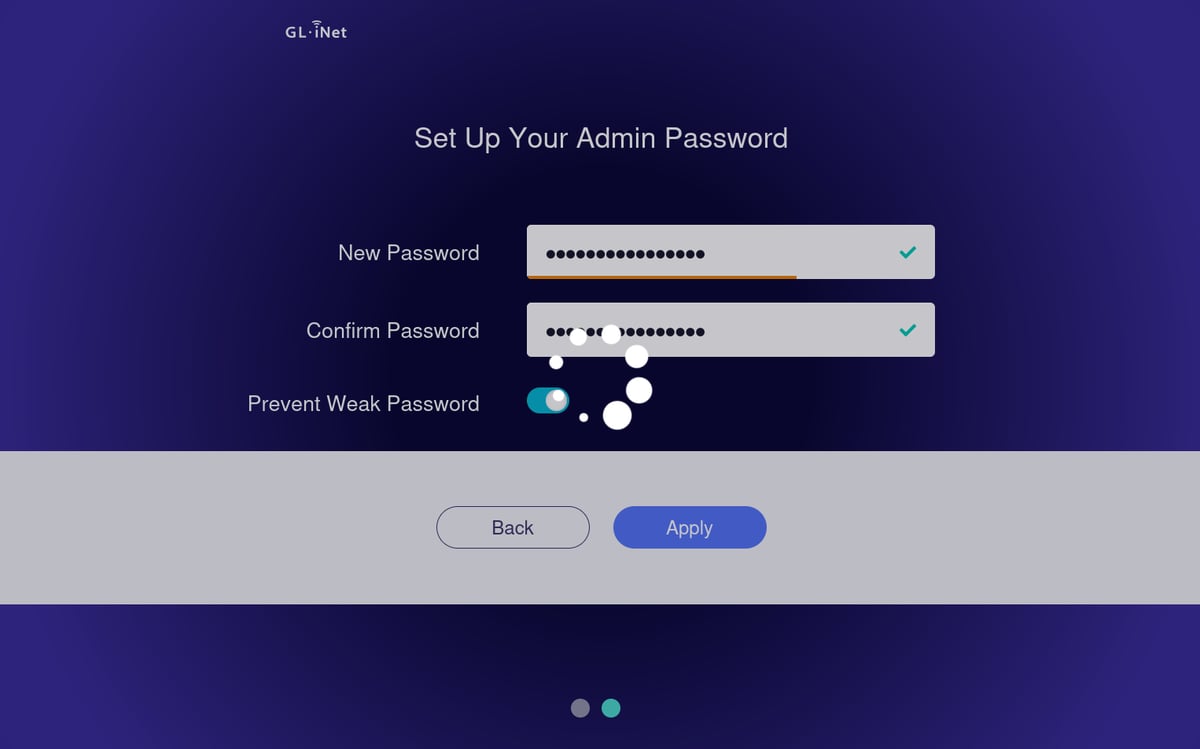
You’ll be asked to complete the first-time setup. This means you’ll select your language, and create an administrator password. This password is for making adjustments and performing updates to the Mango settings in the future.
And to reiterate, do not connect your Mango to Wi-Fi or change any other settings at this point. You’ll connect to your Wi-Fi network after switching the Network Mode to Extender.
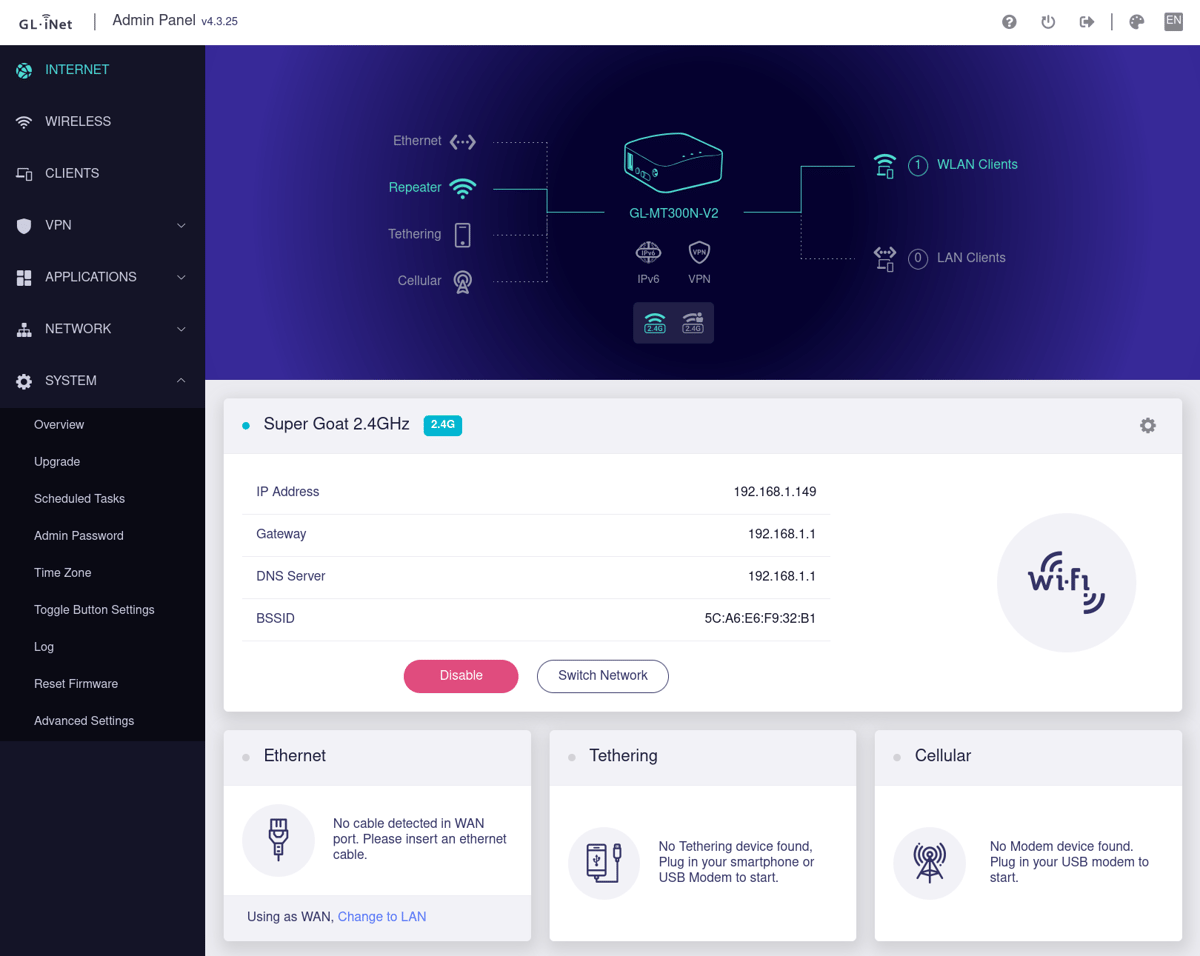
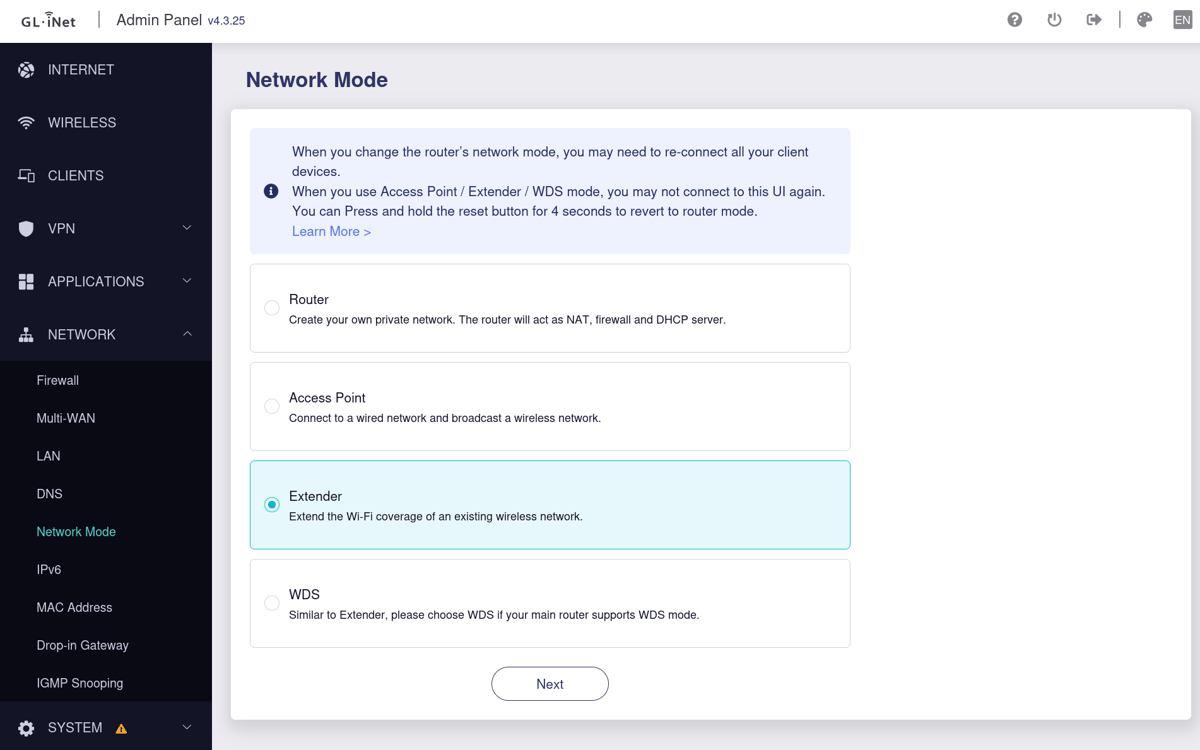
Now the most important step: We need to change the Network Mode to Extender.
On the left-hand menu, click Network, and then select Network Mode. Now select the Extender option. You will now be asked to connect to your network.
Once the Mango is in Extender mode, you will lose connection to the admin panel. You won’t see any confirmation the process has completed.
You can open it up later by resetting the Mango to Router mode. This is done by holding down the reset button for four seconds. If you hold the button down longer, you might unintentionally perform a factory reset—release it after four seconds.
GL.iNet’s official documentation describes Extender mode in more detail and why it’s necessary. You can also read more about accessing the admin panel after Extender mode is activated.
2. Mount the GL.iNet under the piano
Take the 3M reclosable fastener and cut two strips, sticking them neatly together. Pull off the protective plastic and stick one of the strips to the bottom of your GL.iNet. Make certain not to cover any of the holes used for ventilation. It would be a good idea to take a picture of the information on the bottom, and do your best not to cover anything you need. (I use the area around the QR code.)
Select an area on the control center that’s adjacent to the USB and Ethernet. Carefully clean this area, ideally with alcohol. Remove the plastic protective material from the other side of the 3M reclosable fastener, and mount the GL.iNet. Try to keep it straight and even!
3. Connect everything
Plug the GL.iNet USB cord into the available USB port on the control center.
Connect the GL.iNet router to your Disklavier’s Ethernet port. Use the LAN port on the Mango.
Secure cables with zip ties or twist ties to prevent movement or strain, and to keep the wires neatly out of sight.
After your GL.iNet boots, it should show a solid Wi-Fi connection, and your Disklavier will have a reliable, wired network connection.
That’s it—enjoy your streaming piano!
You’ve successfully connected your Disklavier to Wi-Fi—without headaches! Performances, updates, and network features are now available.
Troubleshooting quick guide
Even with this simple setup, it’s possible not everything will go right. If you have any trouble at all, please don’t hesitate to reach out and contact me.
GL.iNet not connecting?
Check the signal strength and try reconnecting to the Mango’s interface. If 192.168.8.1 no longer loads after switching the Mango to Extender mode, you’ll need to reset it. Hold the reset button for four seconds to return it to Router mode, which restores the default 192.168.8.1 address so you can access the settings again. After making any necessary changes, switch it back to Extender mode for proper Disklavier operation.
You can also try performing a factory reset and repeating the above setup process. This means holding the button down for a total of ten seconds.
There is a known firmware glitch that prevents Extender mode from working properly if you connect to a Wi-Fi network before switching to Extender mode. For some reason, this glitch doesn’t appear consistently. However, if you did this, then you should factory reset the Mango and this time change the Network Mode immediately.
If your piano is too far from your home router for a reliable signal, you may need to add another repeater. This is common in large homes or in buildings with radio-blocking materials such as metal, brick, or concrete.
Disklavier not connecting?
Reseat the cable and ensure the router Network Mode is set to Extender. Ensure that the Disklavier is plugged into the LAN port (in the middle of the Mango).
It might be necessary to factory reset the Disklavier. This has been necessary with several Mark IV systems recently. Stale network settings might be to blame.
Try connecting a phone or laptop to the GL.iNet wireless network. Verify you have a connection.
While your laptop is connected, you can also go to speedtest.net and verify you’re getting proper speeds. The Disklavier doesn’t require very much bandwidth, but in my experience it operates less predictably below 4 Mbps. Yamaha’s official DisklavierTV documentation recommends a 4 Mbps minimum. If the bandwidth is too low, the piano will start and stop regularly to buffer.
Please note again that this approach does not work on Guest networks or other highly managed networks. Guest networks often allow web browsing but silently block or disrupt other devices.
You absolutely do not require a 100 Mbps connection to use Disklavier Radio or streaming services. A stable connection above 4 Mbps (even from a cellphone hotspot) is usually more than enough; stability and latency matter more than raw speed.
Still can’t find your Disklavier in the app?
Ensure the router Network Mode is set to Extender. Ensure that the Disklavier is plugged into the LAN port (in the middle of the Mango). There is a known firmware bug that requires you switch your Mango to Extender mode without connecting to your Wi-Fi first. If you did this, then factory reset the Mango and try again, skipping directly to that step.
There might be a problem with the local network. Some networks isolate devices so that they can’t see one another. This is variously called wireless isolation, station isolation, or client isolation, and is common on guest or public networks, but unusual on home networks. However, I did recently assist a customer with this setting accidentally enabled on their own home network, so it does happen. This is a setting you can change on your router.
Over the last few years, I’ve increasingly run into customers using VPNs: If you use a VPN on your cellphone, it will typically be unable to communicate with local devices on your network. Turn off your VPN. If that’s not an option for you, consider placing your entire house behind a VPN, with either a larger GL.iNet router (such as the GL.iNet “Flint” GL-MT6000) or a Protectli Vault. These allow you to protect all of your devices together, and they’ll all still be able to see one another locally.
I have only a 5 GHz network!
The “Mango,” for all of its excellent characteristics, does have one downside. It can only connect to 2.4 GHz Wi-Fi networks. If you need to connect to a 5 GHz network, you can replace the “Mango” with the GL.iNet GL-SFT1200 “Opal.” This is a sophisticated, exceptional device for the price. However, it does have considerably higher power requirements, and cannot run using the USB ports on your Mark IV, E3, or ENSPIRE.
You’ll therefore have to add a power strip underneath your piano. My pick would be the Tripp Lite 7 Outlet Surge Protector with 12 Foot Cord, but you can also see my article on surge protectors for the Disklaviers for more. I choose this surge protector whenever I have to mount the surge protector up underneath the piano. It doesn’t have the same noise reduction or insurance as the other surge protectors I recommend, but has the advantage of being very easily mountable with zip ties.
And these are the zip ties I use. They’ll serve to hold up both the surge protector and the “Opal.” Other than this modification, the rest of the setup works the same way as the “Mango.”
My home Wi-Fi uses WPA3-only
Some newer routers default to WPA3-only security, which the GL.iNet Mango does not support on its 2.4 GHz radio. If this is the case for you, log in to your router and confirm the Wi-Fi security mode. Verify your router is set to support WPA2 or WPA2/WPA3 mixed. If the router is set to WPA3 only, the Mango will fail to connect. If the router does not support WPA2 at all, you should consider the GL.iNet GL-SFT1200 “Opal.” This is an excellent device, but does not run off the Disklavier’s USB port, and requires its own power source.
What do the lights mean?
When you look at the GL.iNet Mango with the indicator lights on the left side and the Ethernet ports on the top, the lights mean:
Top light: This should stay lit at all times. It indicates the Mango has power.
Middle light: The Mango uses this as the WAN indicator. Because we’re plugging the Disklavier into the LAN port and using the Mango as a bridge, this light will always be off.
Bottom light: A solid light means the Mango has fully booted. A blinking light indicates network activity.
Why not use powerline adapters anymore?
Powerline adapters rely on your house’s wiring, which is unreliable in homes with multiple breaker panels or newer AFCI breakers. They’re also prone to interference in some homes. When they work, they’re by far the simplest to set up and maintain. However, I’ve had enough frustrations in customers’ homes now that they’re no longer my first choice.
The GL.iNet travel router eliminates those issues. Additionally, it draws its power from the USB port on the control center, so you don’t even need to add a power strip! Unlike with the Powerline adapters, you can now plug your Disklavier into a Tripp Lite ISOBAR6ULTRA surge protector (which includes $50,000 in insurance) without interfering with the signal! For more on this, see my article on surge protectors for the Disklavier.
It’s compact, clean, and keeps your Disklavier online without fail.


Hi Alexander….new to this Facebook group. I have a Disklavier Mark III. I think I know the answer before I even ask, but the setup you described above….can it be accomplished on a Mark III. Thanks in advance. Regards…Michael
Hello Michael! The Mark III is a wonderful system; however, it doesn’t connect to the internet like the Mark IV, E3, or Enspire. It can’t connect to Yamaha’s Disklavier Radio, Disklavier On Demand, or other services, so this setup wouldn’t work for it.
However, the Mark III is an excellent candidate for PianoStream. That will let you control your piano from an Apple device, and access PianoStream’s large database of songs over the internet.
Here’s a video of a Mark III using PianoStream, posted by the developer.
Thank you Alexander. I figured as much. I guess I was an “early adopter” of the Yamaha Disklavier, given that I have the Mark III. I do have PianoStream (I just set it up last week) and it’s an OK substitute so I guess I will have to be content with that. On the PianoStream, I have been successful in getting the Digital side set up, but am struggling with the Analog side. Hopefully I will be able to find a source that can help me with that part, but if I never get the Analog side set up, I am still happy with PianoStream. Thank you for answering my question so promptly. I appreciate being a member of your group on Facebook. Best Regards, Michael
Great! If you’re looking for assistance setting up the analog side, contact the developer of PianoStream, Richie Hayes, by texting or calling (801) 687-5413. He’s got a reputation for helping people out over the phone, and has tons of experience setting up PianoStream on every imaginable system (he’s got a related video for the Mark III here). And I’m happy to be of assistance as well!